If you’ve ever wanted to create a beautiful Naguri pattern or textured wooden surface inspired by Japanese woodworking, this simple router jig makes the process surprisingly approachable.
In our latest video on the Makers Manual YouTube channel, we show how we designed, tested, and refined a DIY router jig for creating consistent Naguri-style textures using a handheld router. Along the way we experimented with different router bit sizes, jig settings, router depth, and base materials to find what actually worked best in practice.
In the video we cover:
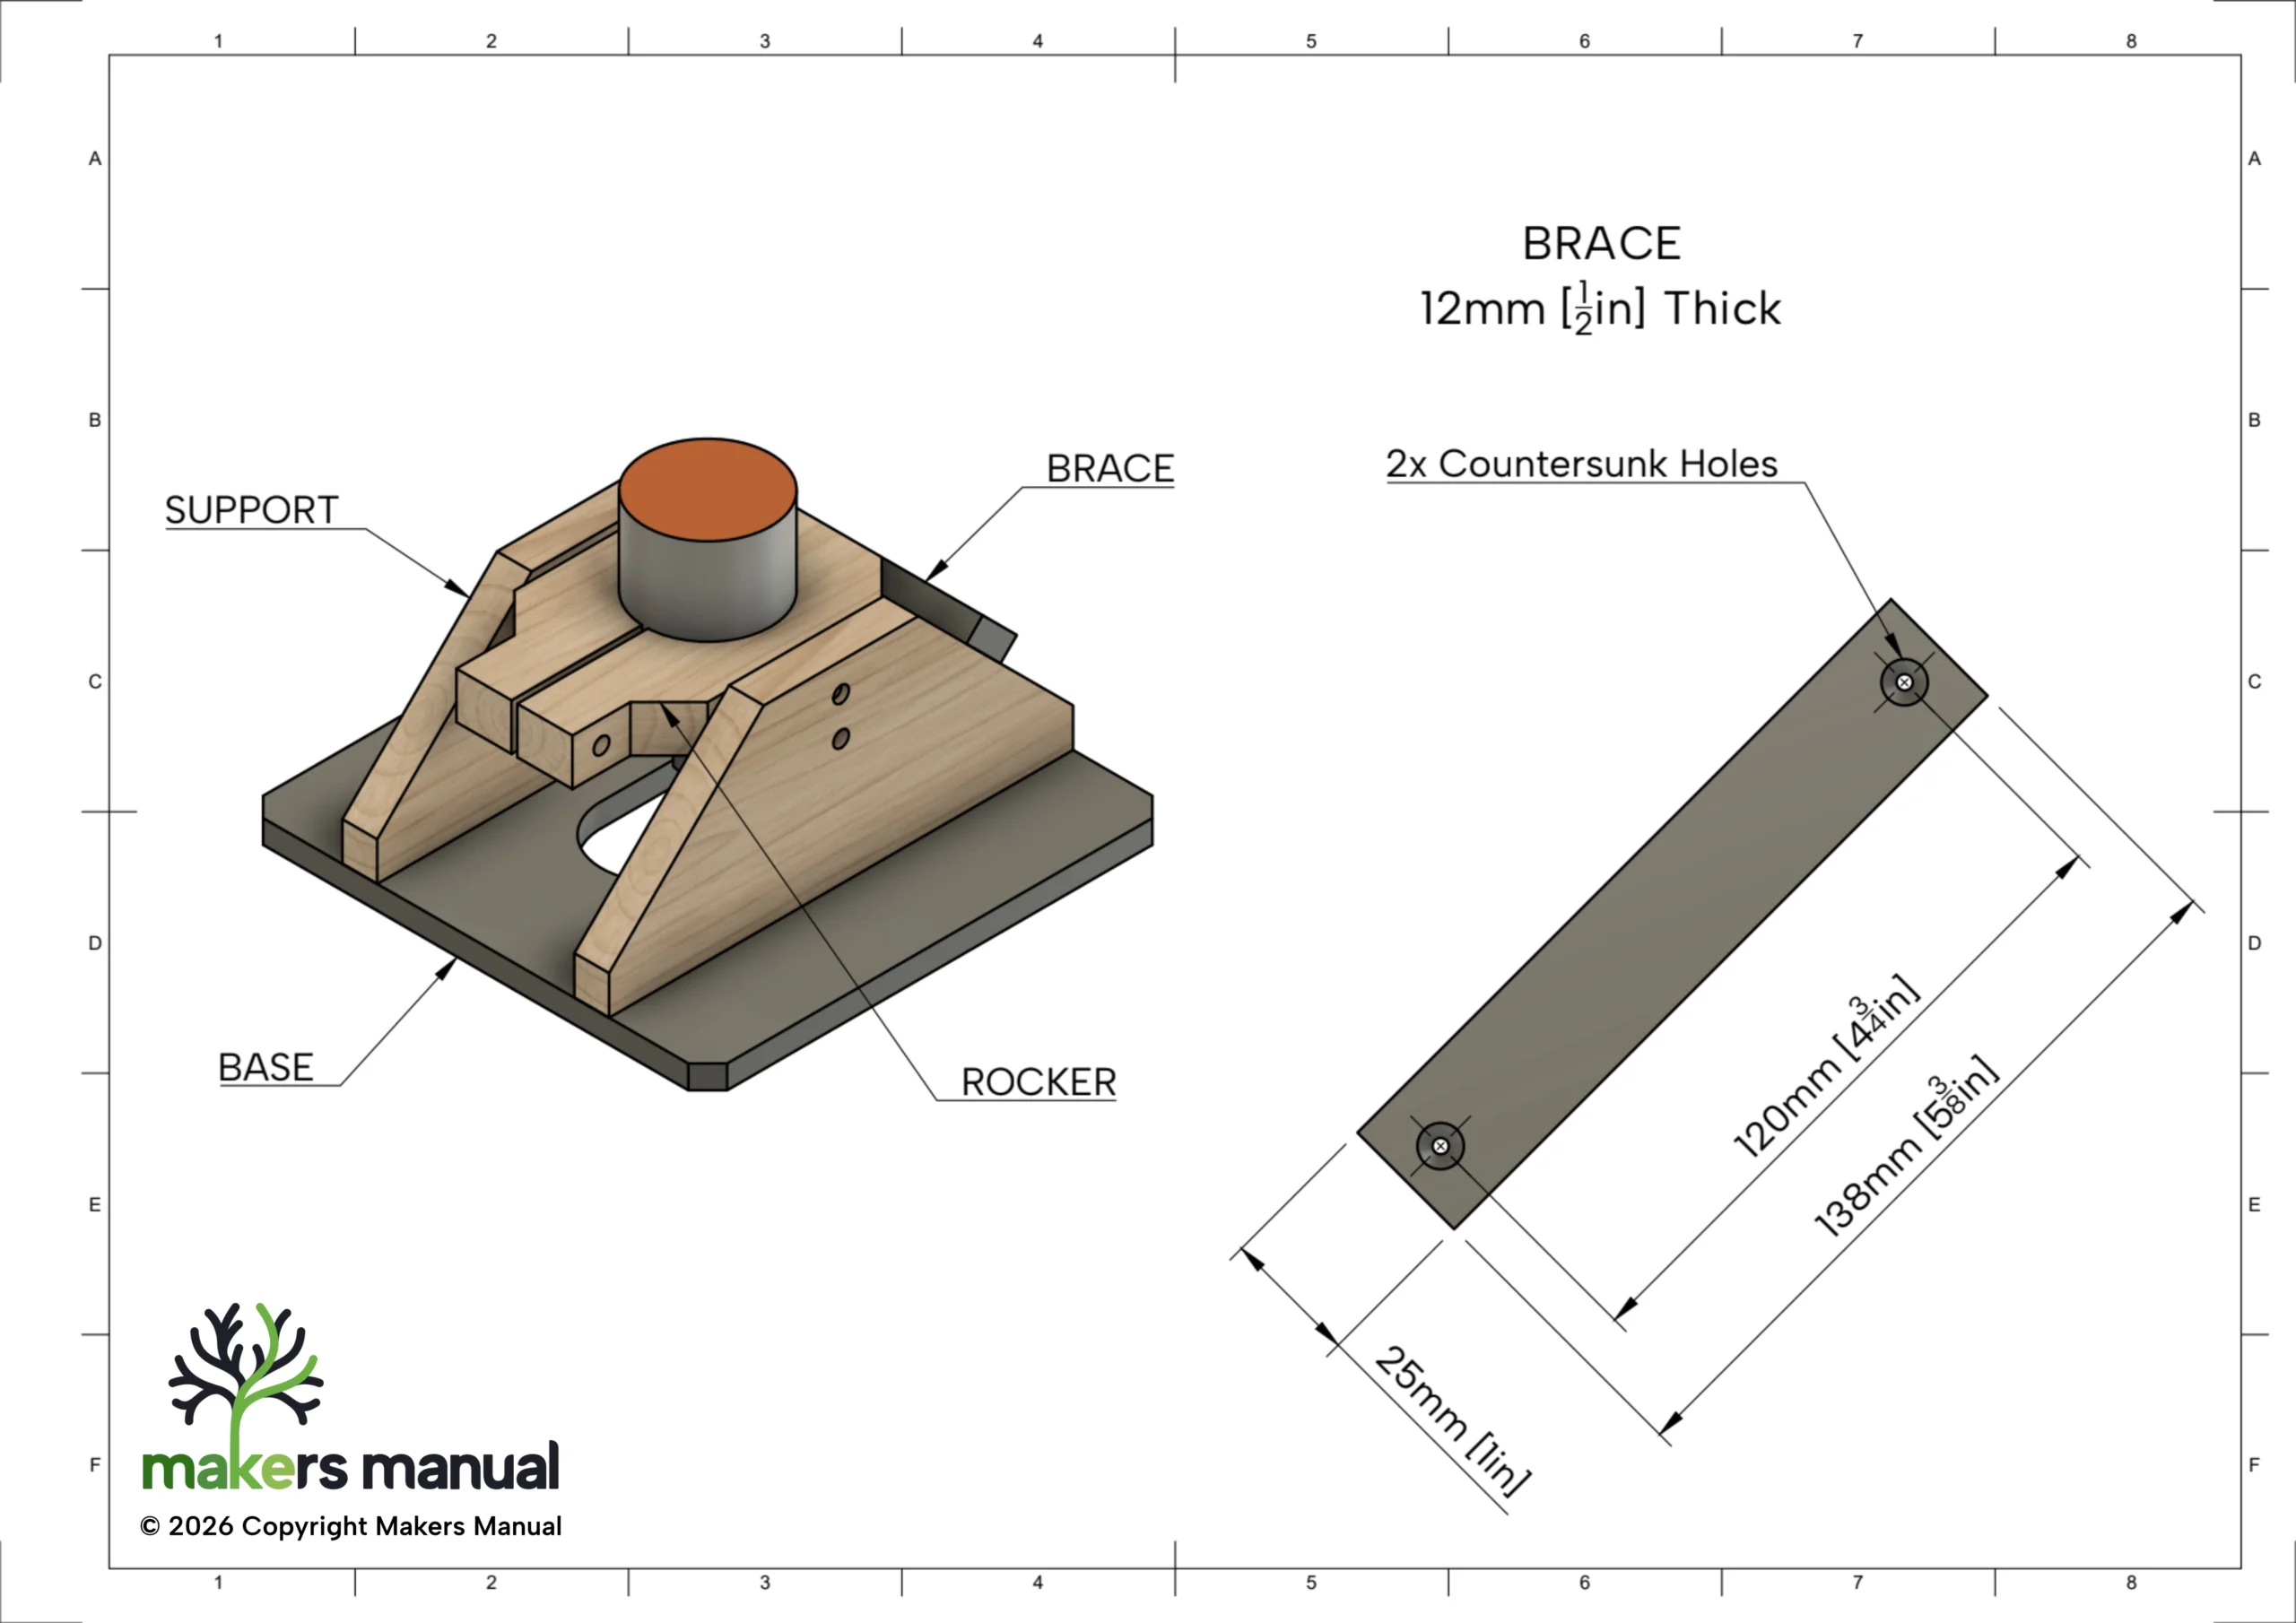
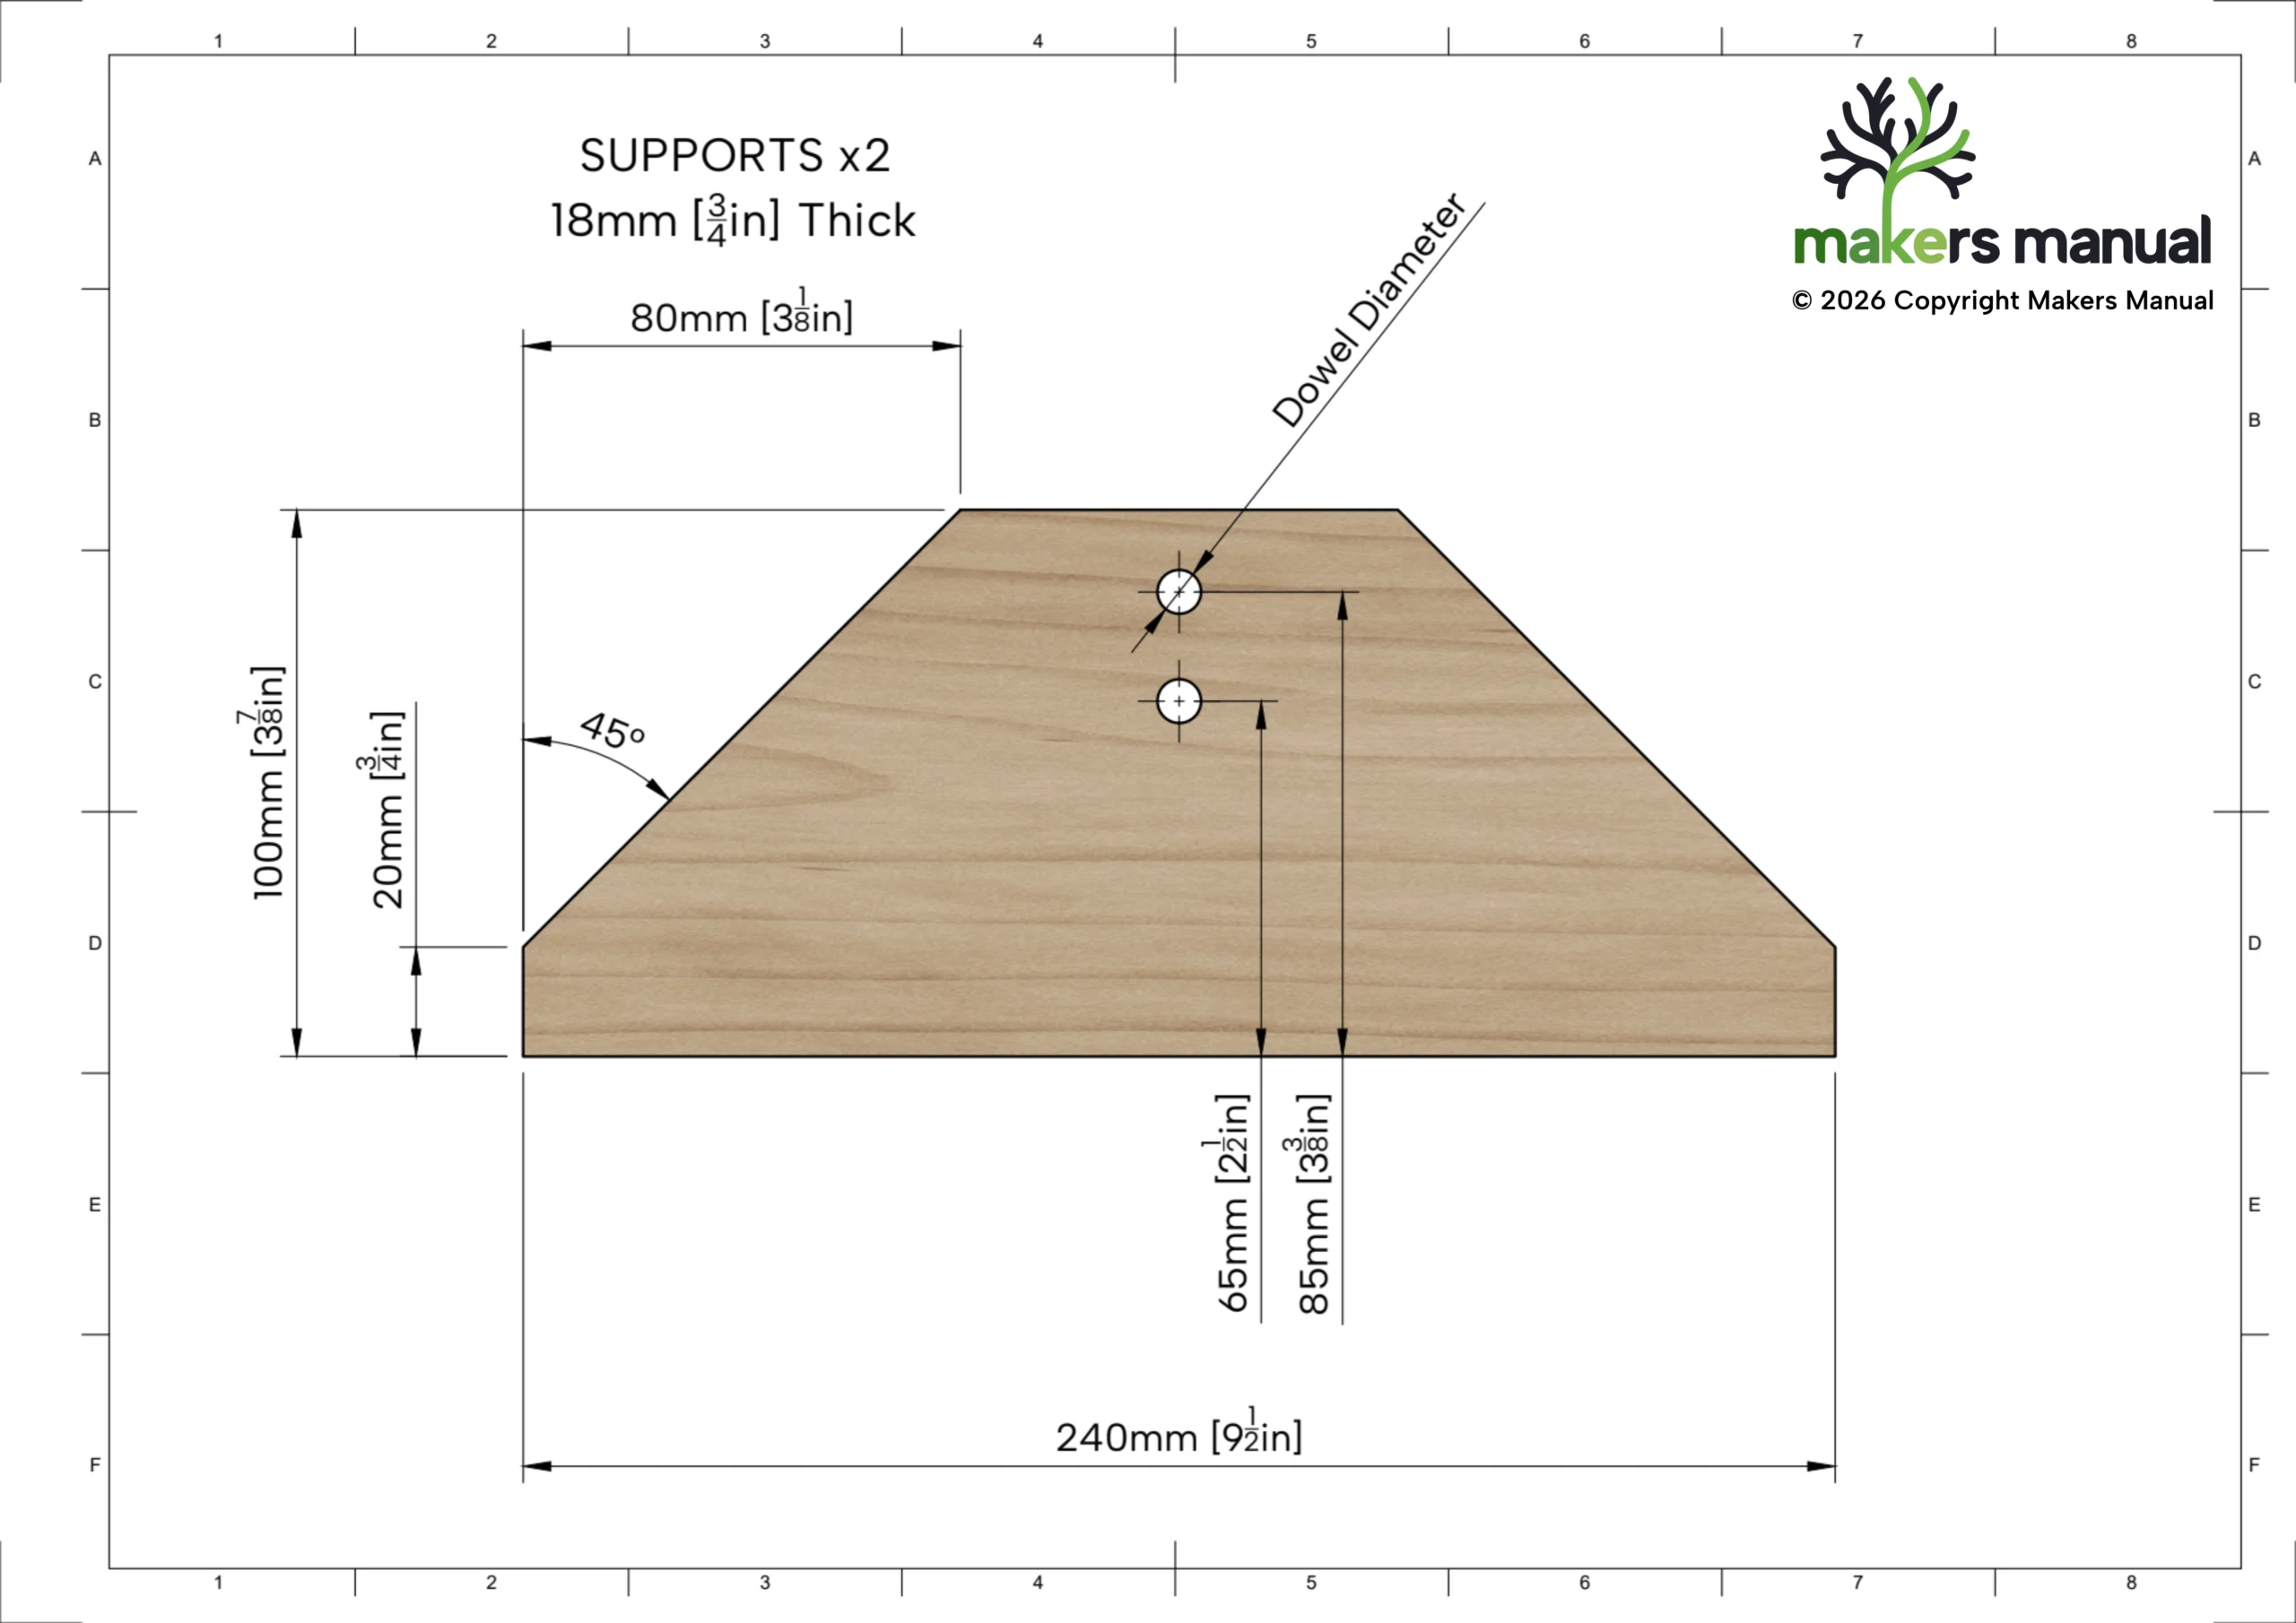
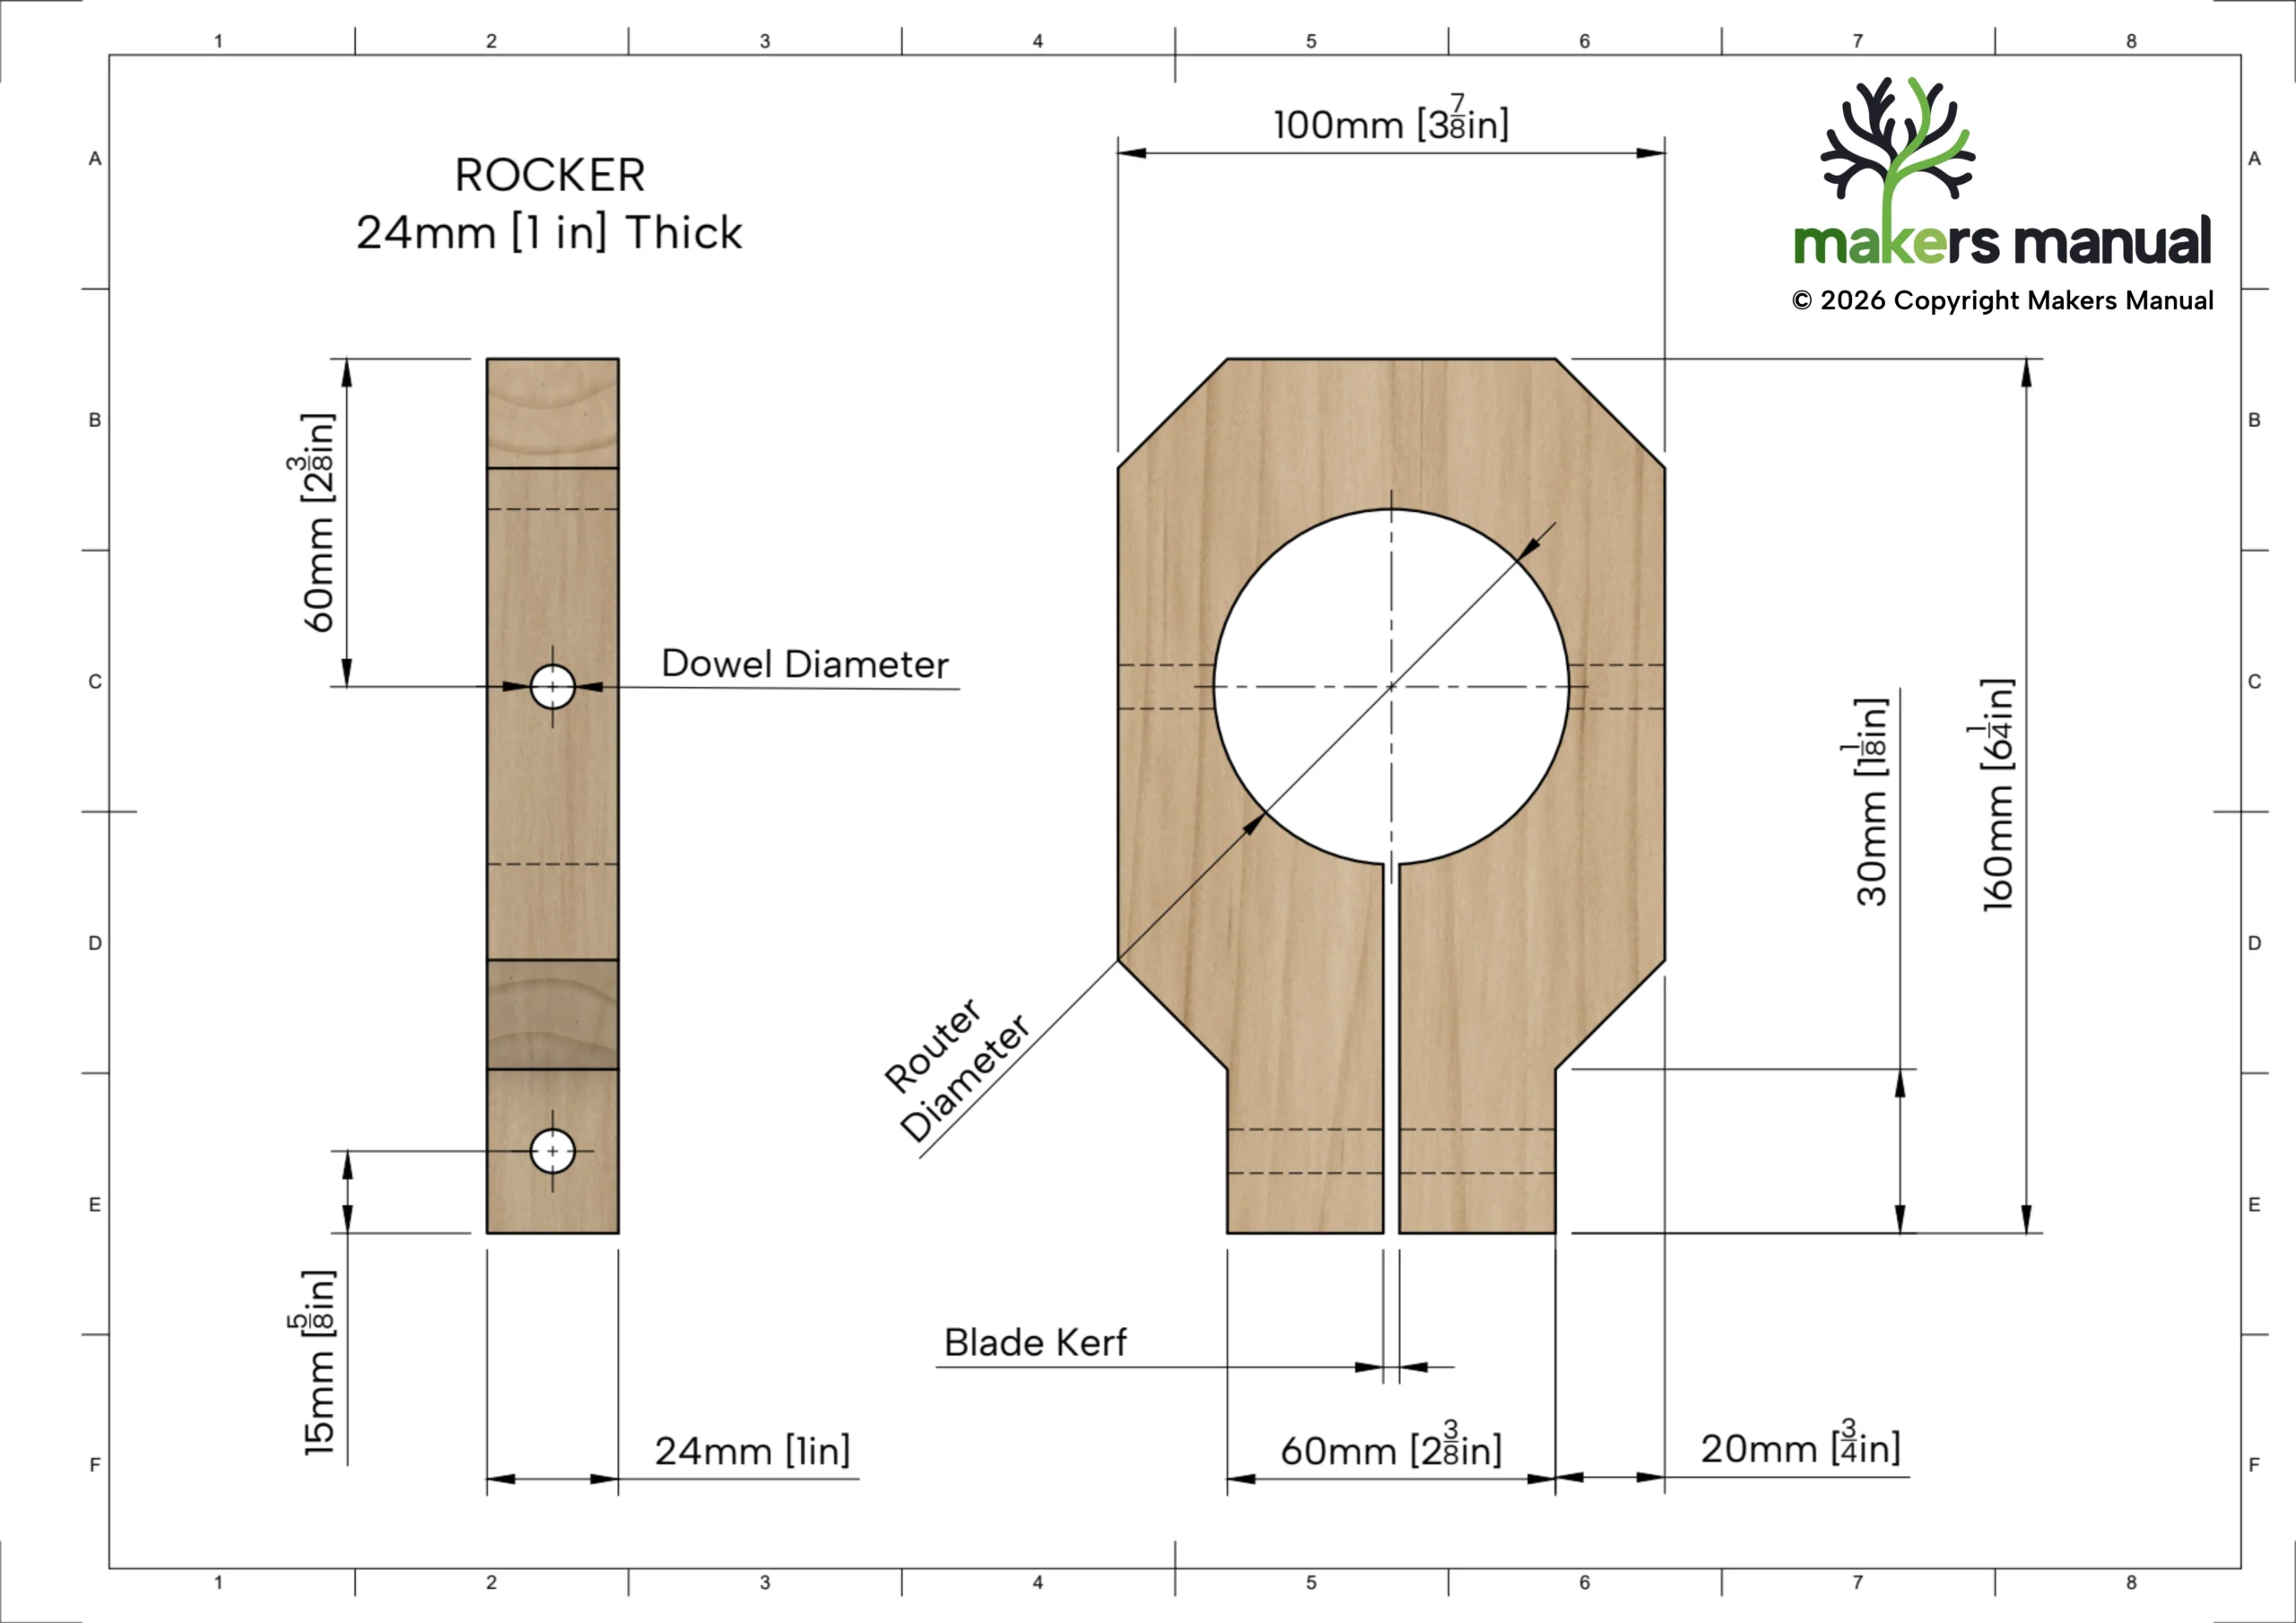
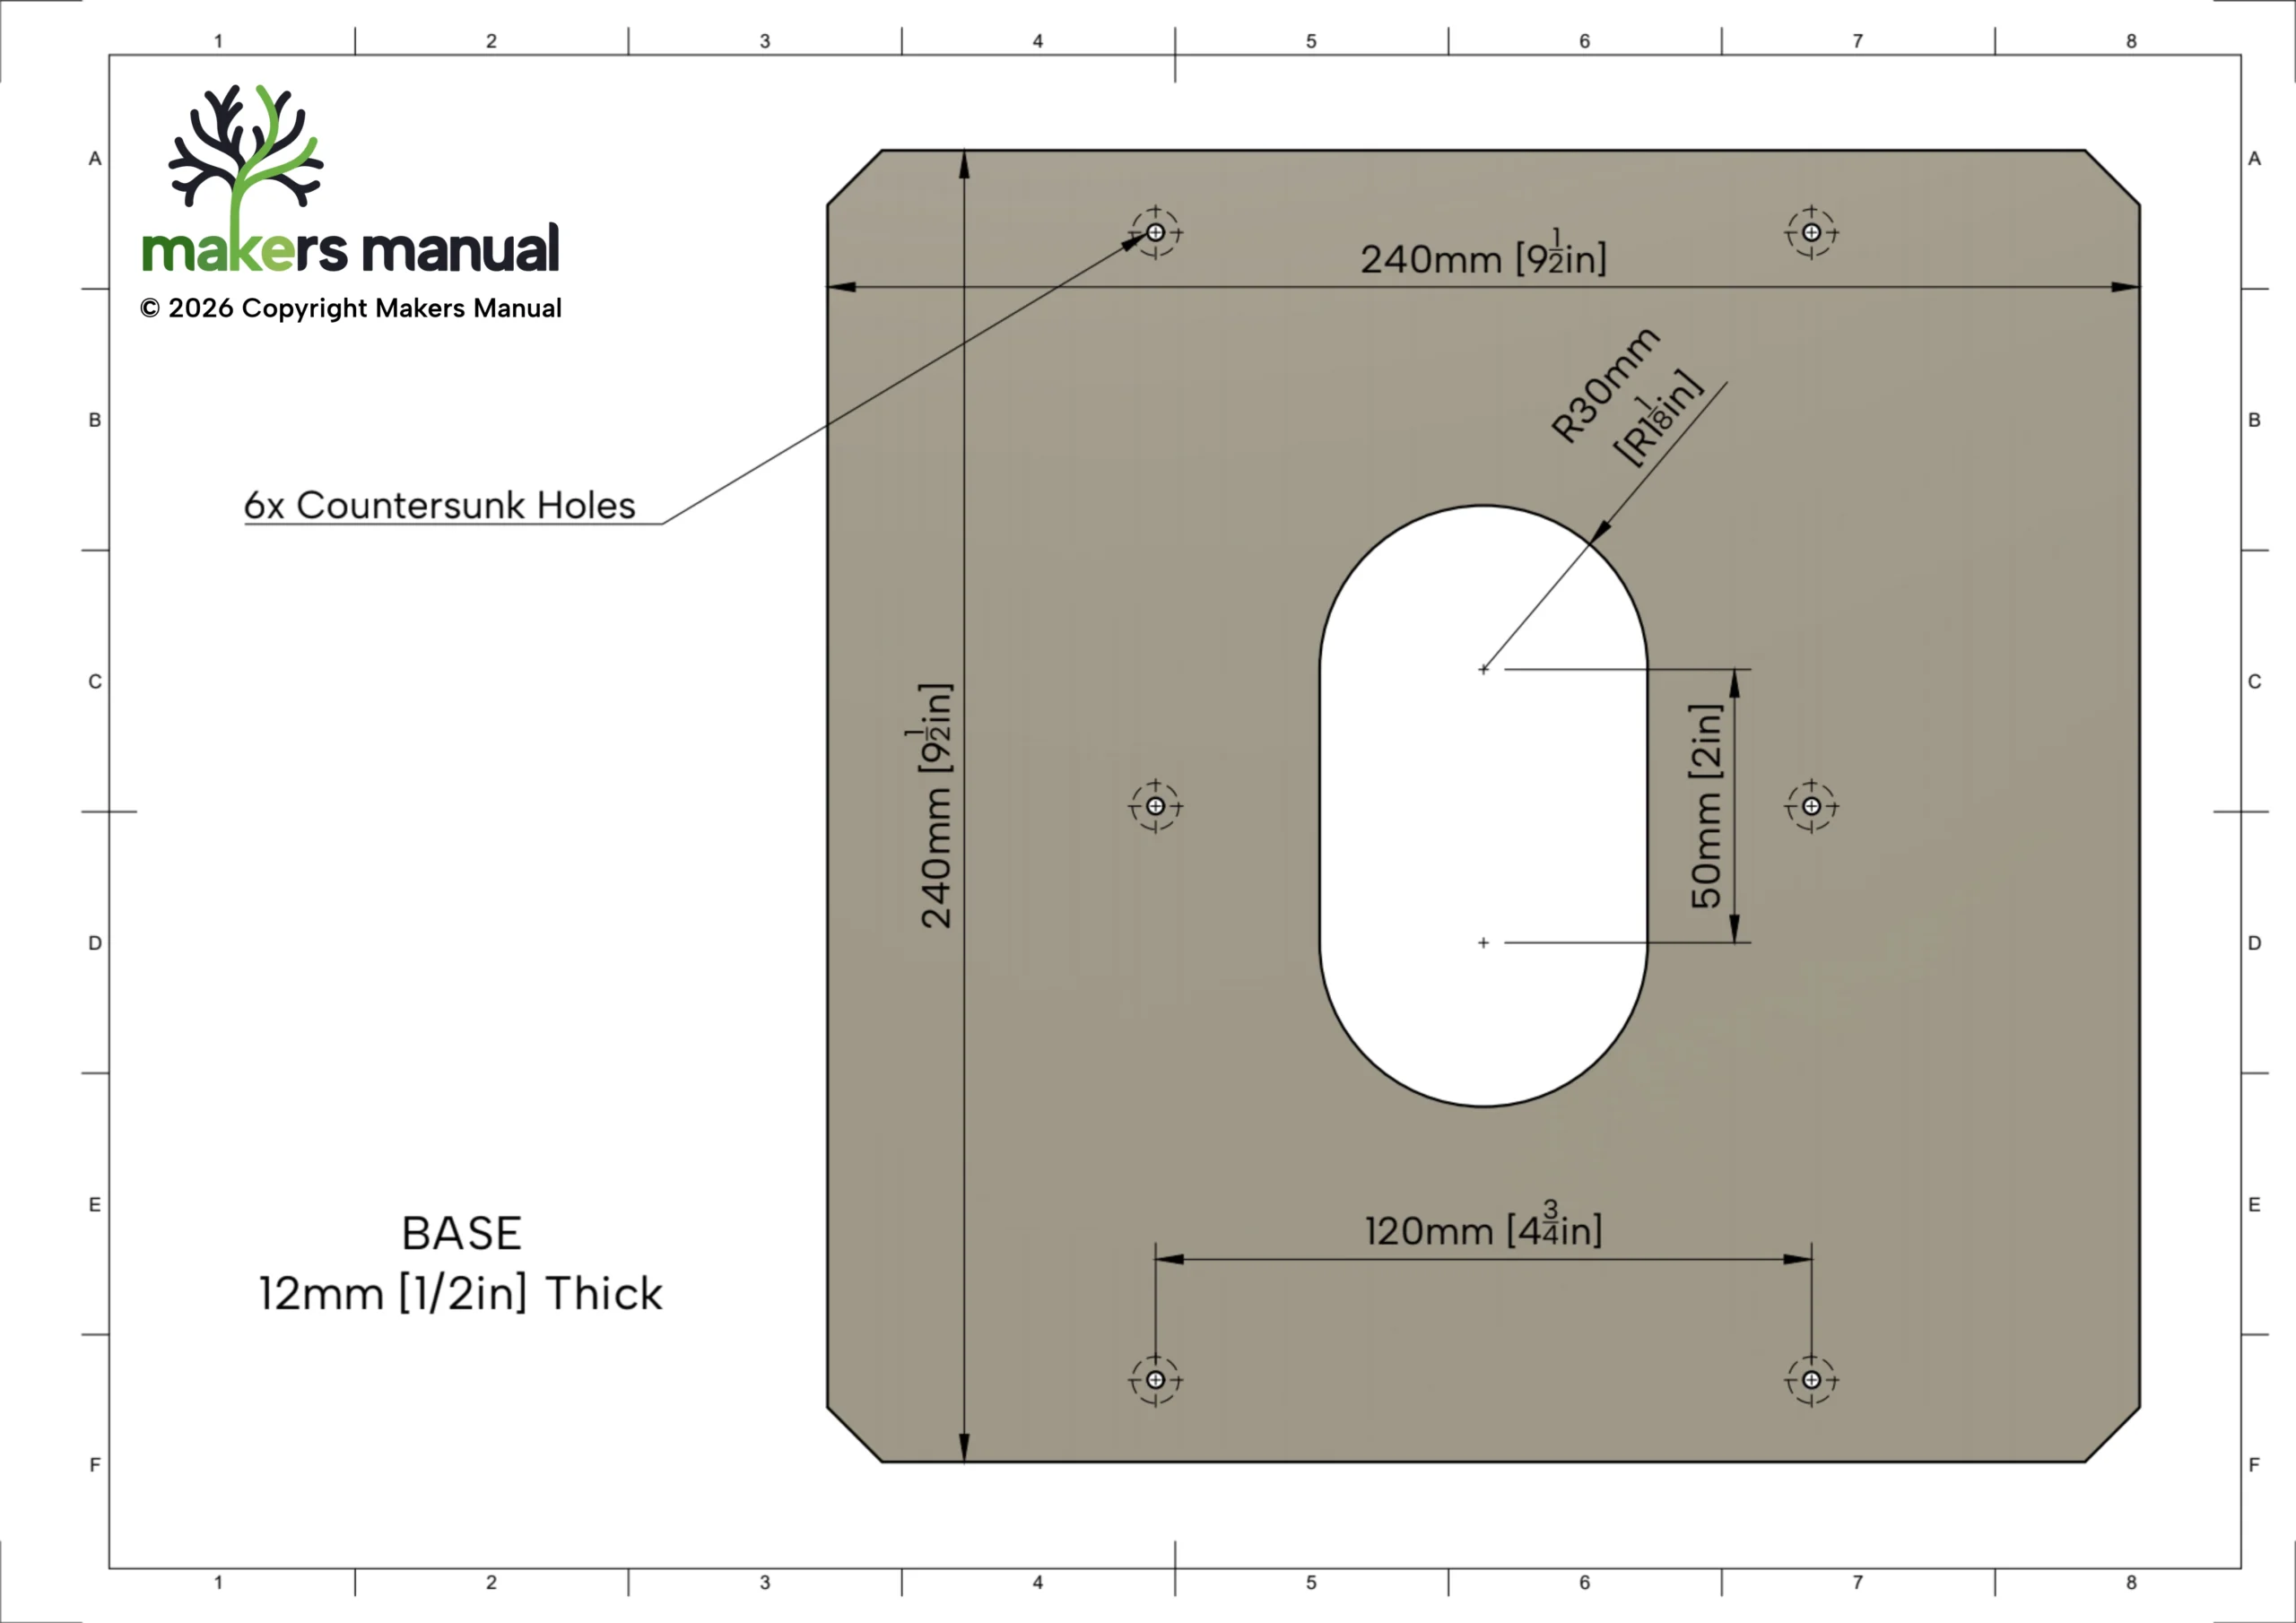
- How to build the jig
- Router setup and depth adjustment
- The best router bits we found
- Common problems and how we fixed them
- Tips for getting cleaner, more consistent results
- How to create both random and regimented Naguri patterns
Whether you’re into DIY woodworking, woodworking jigs, or just experimenting with new woodworking projects, this is a really fun technique to try.
Free Naguri Router Jig Plans
You can download the free Woodworking Plans for the jig below. Just save the images and print. If you’d like to support my work, please buy me a coffee below, thank you kindly.

What Is a Naguri Pattern?
A Naguri wood texture is a traditional Japanese surface finish created by carving repeating patterns into timber. Traditionally this would often be done by hand, but this Naguri router jig allows you to recreate a similar effect using modern woodworking tools and a standard router.
The result works brilliantly on furniture panels, cabinet doors, boxes, table tops, and feature pieces where you want extra texture and character.
Router Setup Tips
After quite a bit of testing, these were the settings that gave us the best results:
- Set router depth to 2mm.
- Use a 3/4″ router bit for small projects. Use 1 1/8″ router bit for medium to larger projects.
- Experiment with 65 & 85 jig settings. This changes the length of the cut.
- Adding sandpaper to the base improved stability
- A straight edge worked better than building a fence into the jig itself
Tools Used
Support the Channel
If you’d like to support future builds, free jig plans, and more woodworking content, you can support us here:
Every bit of support genuinely helps us keep making videos and experimenting with new ideas.
Thanks for reading and we hope you enjoy the project!