This is how we made a wooden house sign using a palm router to carve the letters. Full disclosure, the video was never intended to be public. It was a test video we made so that we could explore our new camera, editing software and presentation skills. So, it isn’t a perfect video, but we thought it was too good to stay hidden away.
This article is intended to complement the video above, to cover all the points we forgot to say on camera.


Step 1 - Templating
On the computer, format the lettering as you want them to appear on the sign. You will need to find a font that is simple, bold and has consistent line thickness. We used Bahnscgrift SemiCondensed in Bold @ 64mm tall. Next print off the house name at 1:1 scale and add a centreline to all the letters. This is essential in lining up the router in the next step. Finally, use carbon paper to transfer the printed letters onto the timber.

Step 2 - Routering Letters
Using a V-Groove Cutter, we started by routering all the straight parts of the letters. That would be the “H”, “A” etc and the straight parts of the “U”, “G” etc. This is easily done using the jig that is shown in the video.
Cutting the rounded elements was a little daunting, but a combination of practice and a good router makes the job relatively straight forward. We would recommend a light weight palm router, as it is easiest to manoeuvre.

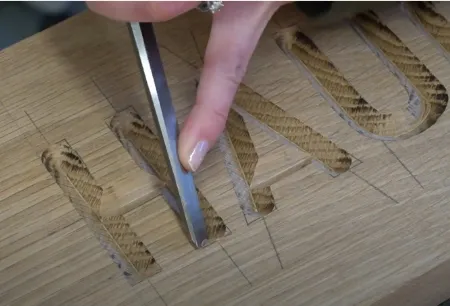
Step 3 - Clean Up the Corners
Next use a chisel to clean up the corners, a sharp chisel really helps here. As you can see in the video, we used the chisel to score between the deepest part of the ‘V’ to the corner of the pencilled letters. Then simply work towards that scored line removing a little material at a time.
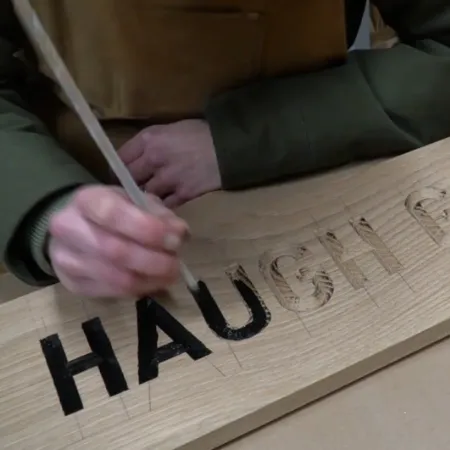
Step 4 - Paint the Letters
We used an outdoor wood paint to colour the letters, but you could also use a colored resin or leave the letters natural. You’ll need a few coats.
No need to be super careful here, as you’ll give the sign a sand once the paint has fully dried.

Step 5 - Fitting the sign
There are many ways that you could fit the sign: wall mounted, post mounted, hanging from a chain etc. We opted for post mounted, the details of which are in the video.
