The Festool Domino DF500 Joiner is an exceptional tool, but to fully harness its potential, it’s essential to invest some time in learning how to use it effectively. We’ve put together a detailed YouTube guide, compiling the best tips, tricks, and insights gathered through extensive research. While we highly recommend watching the video, you can also find a concise summary here.
The Tool
Time Stamped – https://youtu.be/zpcTeHwL2TE?si=N1x9qb20Nmyu2PjZ&t=65
Before making any joints, it’s helpful to know a few things about the tool.
The Fence
Setting the Fence Angle is straightforward and works just like a biscuit joiner.
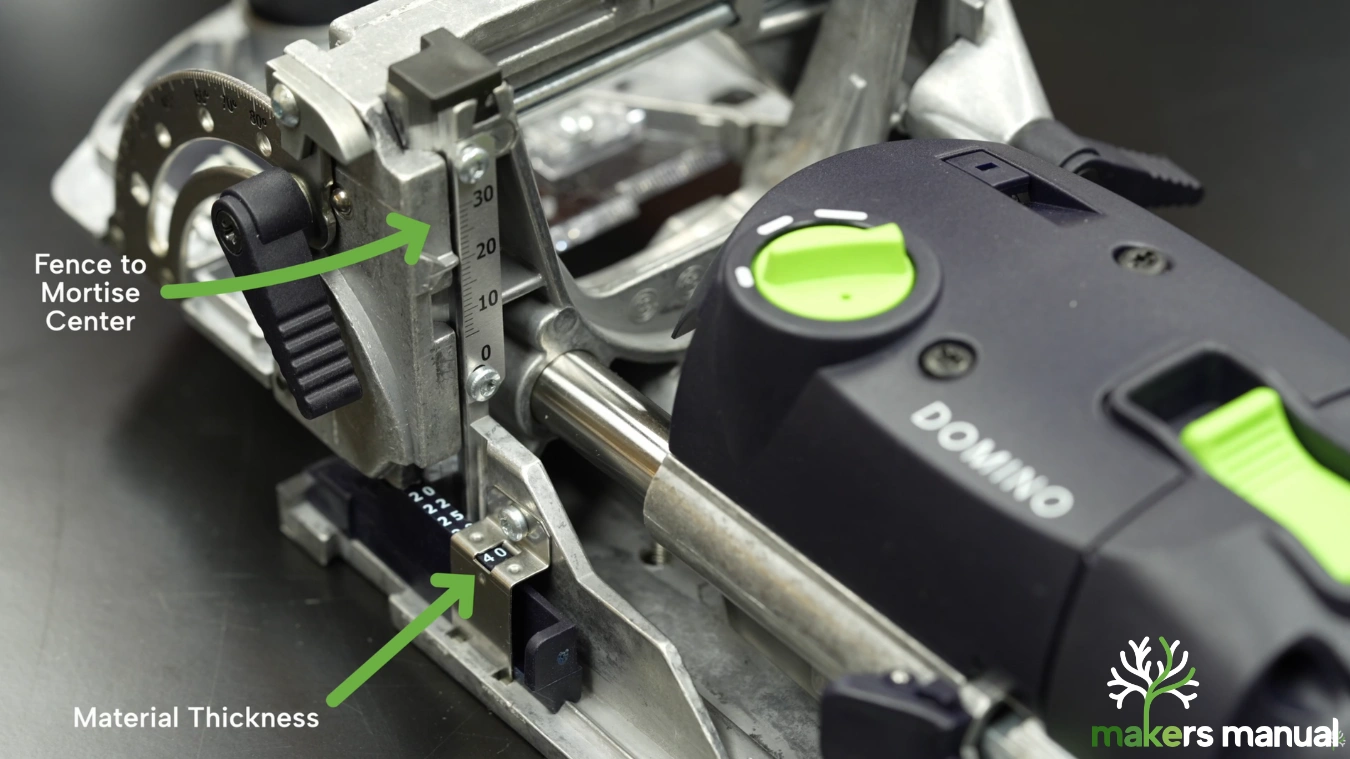
Setting the Fence Height is a little more involved. You can use the gauge which measures from the fence to the center of the mortise or use the selection slider where you select the material thickness. Note that 40mm on the selection slider, measures 20mm on the gauge. I would prioritize using the selection slider, as this is more repeatable for the future.
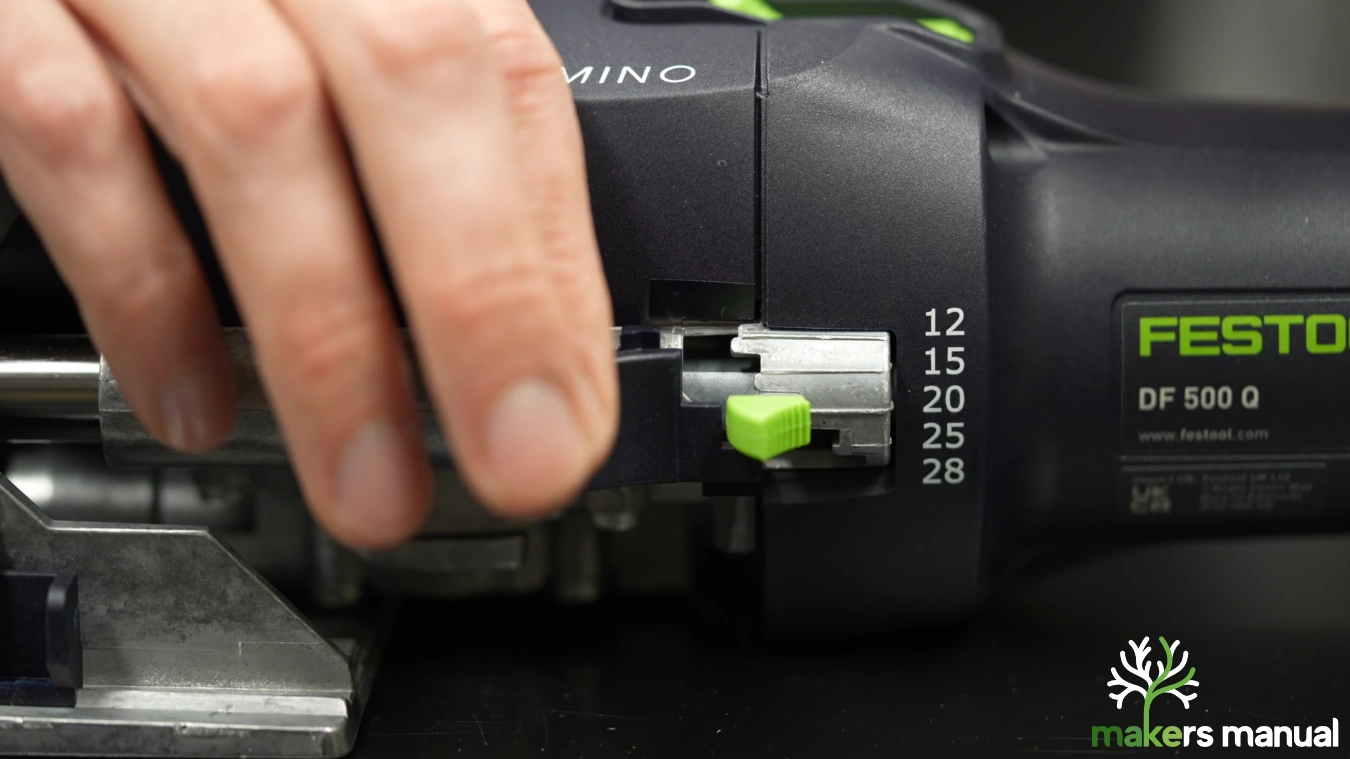
Mortise Depth
Set this to half the length of the Domino. For instance, if using a 8x40mm Domino, then you need to set the mortise depth to 20mm. The only exception to this is the new 4x20mm Domino, that needs to be set to 20mm. If you want to know why, watch the video from here.
Cutters
Different size Dominos require different cutters in the tool. For this reason, we recommend purchasing the Festool Domino in a bundle that includes all the cutters, Dominos and Jigs. This will work out MUCH more cost effective in the long run.

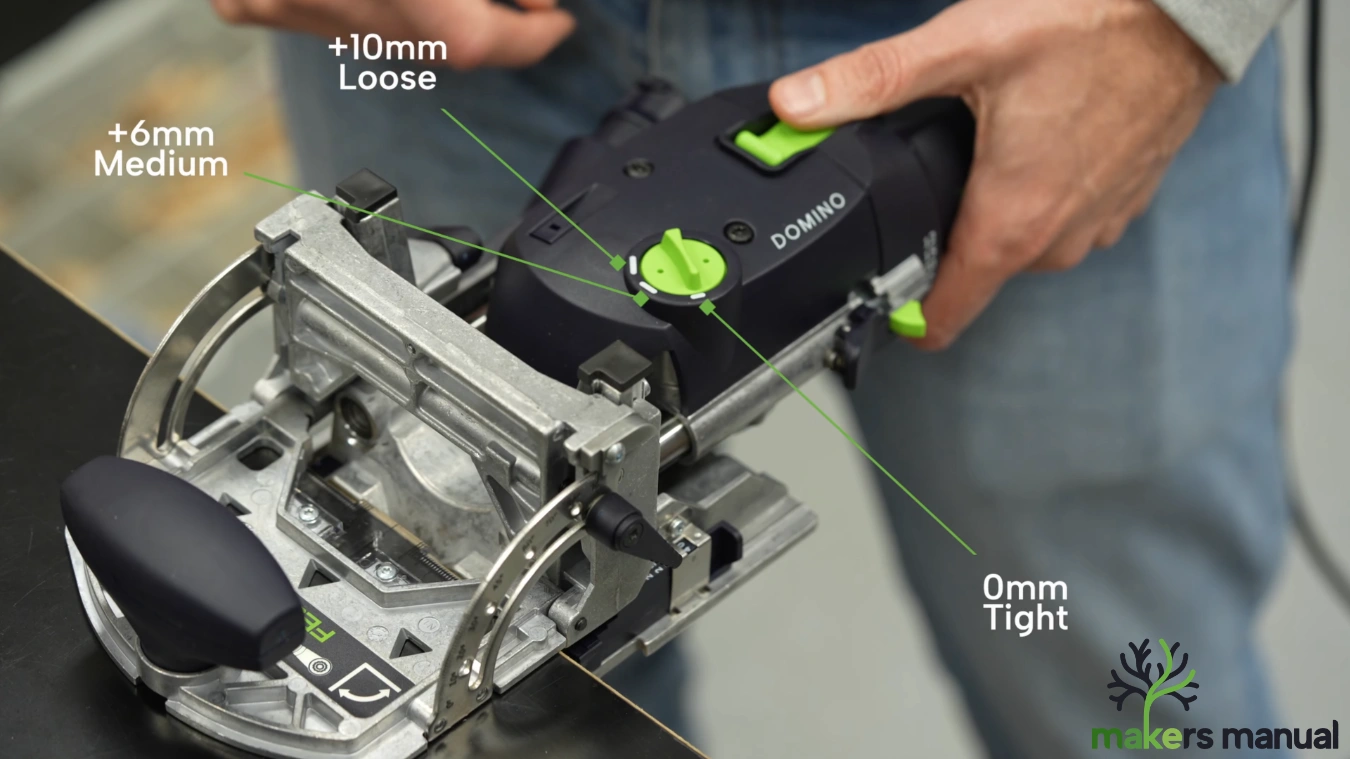
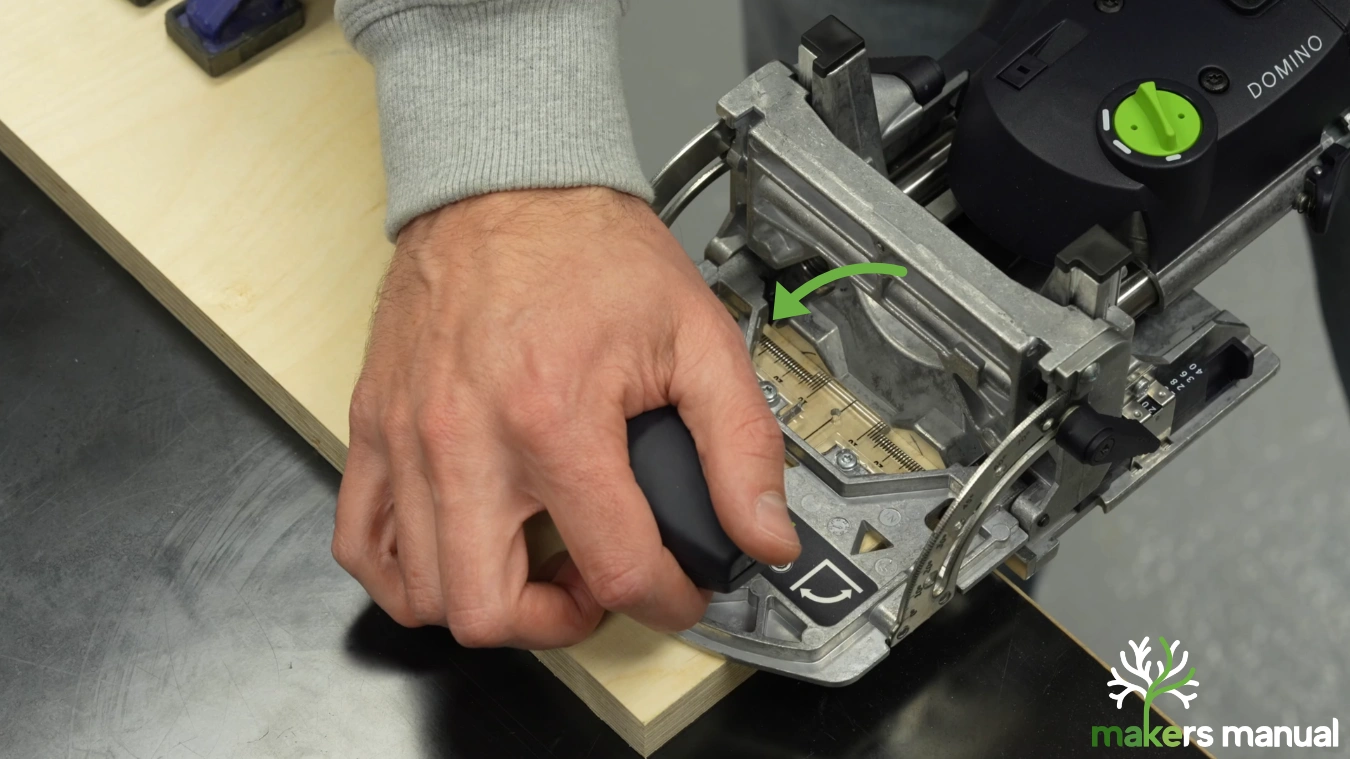
Mortise Width
IMPORTANT Only change with the tool ON! Changing it with the tool off and cause the tool to bind and can break it. You can see this on page 8 of the manual.
The setting changes between tight, medium and loose mortises.
Tool Dimensions
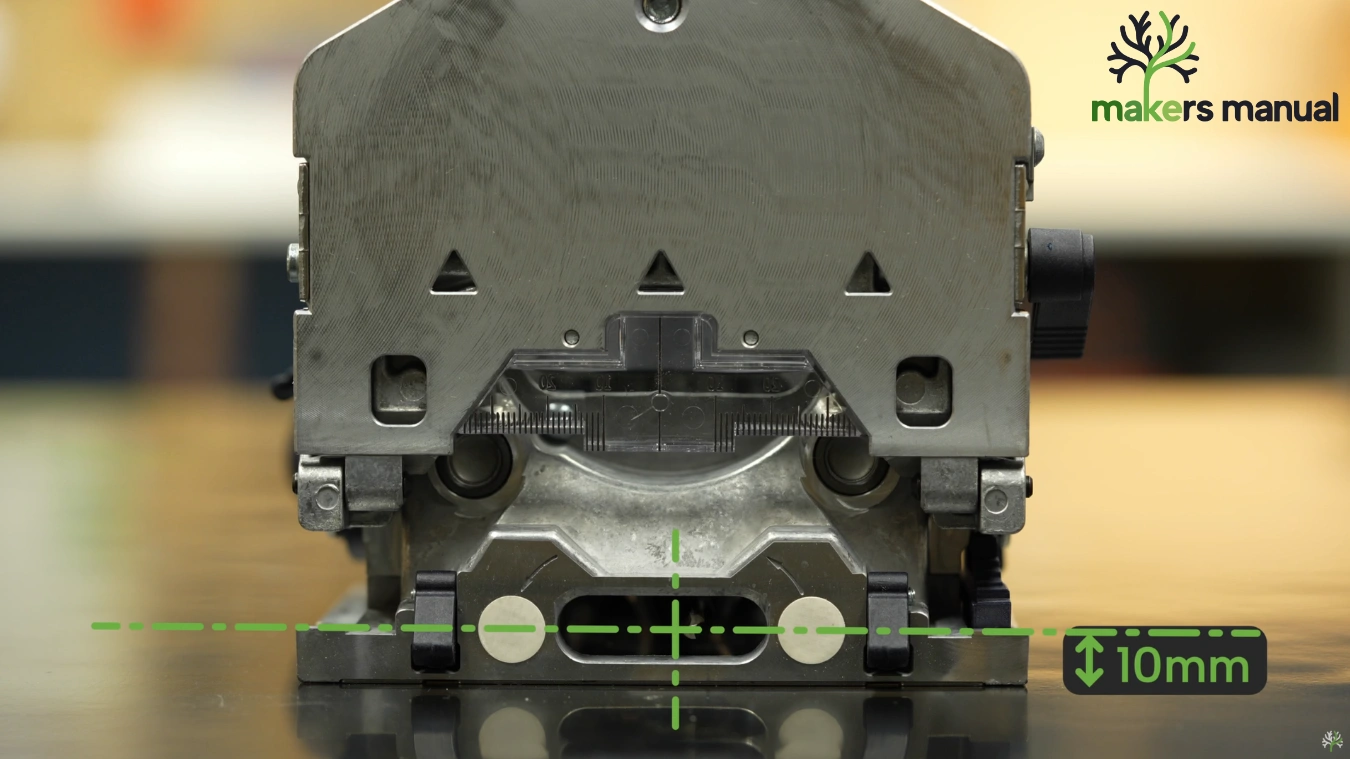
These tabs are 10mm from the base of the tool and the center of the cutter.
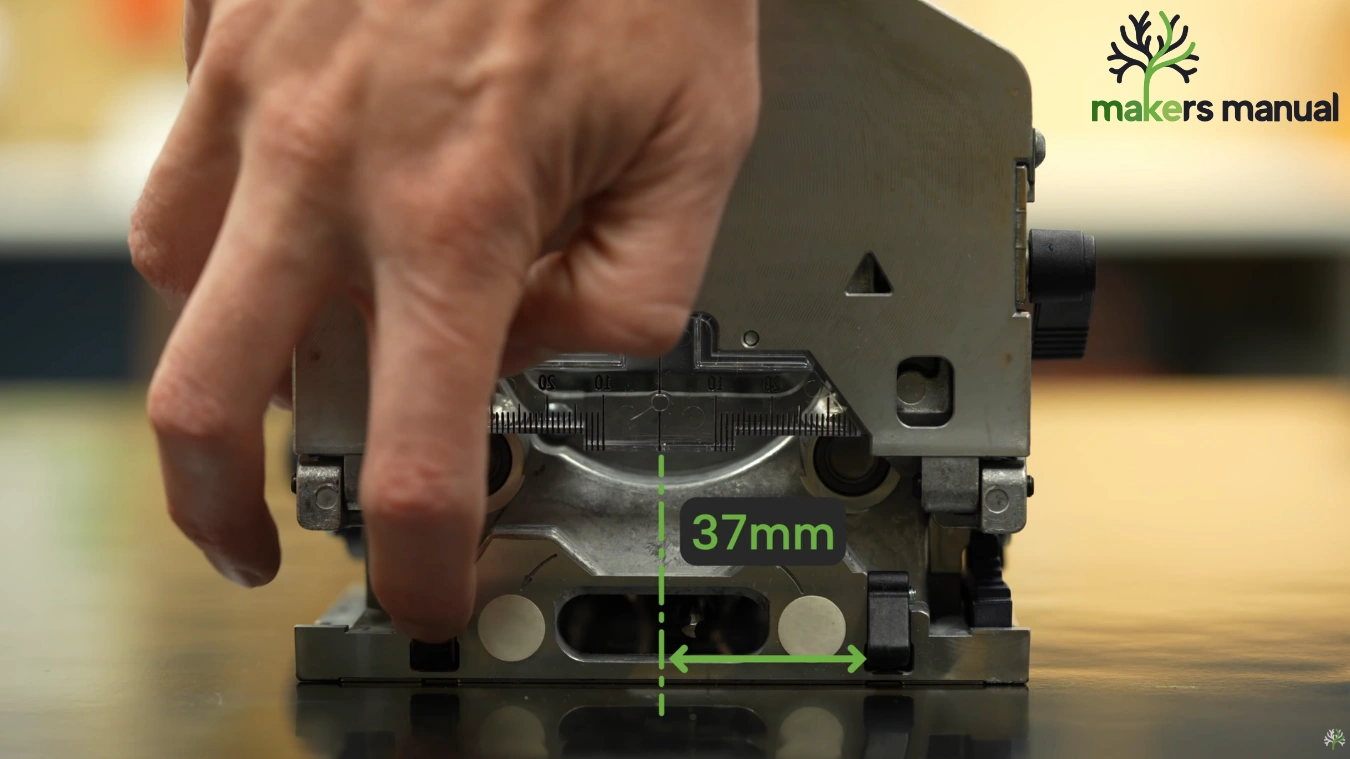
These stop latches are 37mm from the inside to the center of the mortise.
The Domino

Time Stamped – https://youtu.be/zpcTeHwL2TE?si=UjybRNO-ZVAanO4s&t=325
The Domino design is much smarter than you might think. It’s made from European beach which is strong, sustainable and clear grained. The shape provides a lot of stability for your joints, providing planar and torsional alignment. The ridges down the length allow glue squeeze out and the depressions on the face carry glue into the joint. Dimensionally it measures accurately across the flats, but is a little short on the length. This ensures that joints will never bottom out.
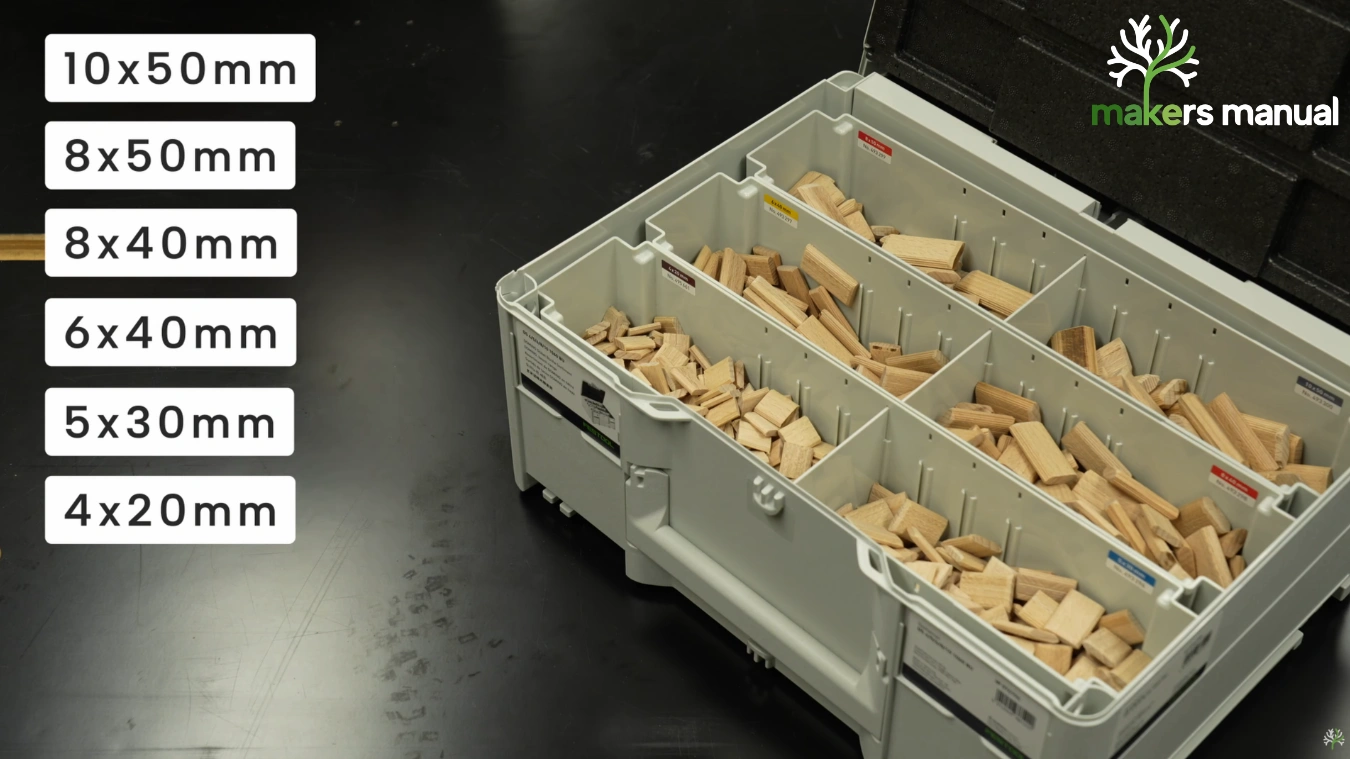
These are the common Domino sizes. Festool has considered the sizes carefully and it’s usually intuitive which size to use. As a general rule, the Domino should be 1/3 the thickness of the material. We go into more detail in the video if still in doubt.
Hints & Tips
Time Stamped – https://youtu.be/zpcTeHwL2TE?si=OPWCGFdw93srW6_X&t=469
These are some of the tips I picked up that can turn you from an adequate, to a pro user.
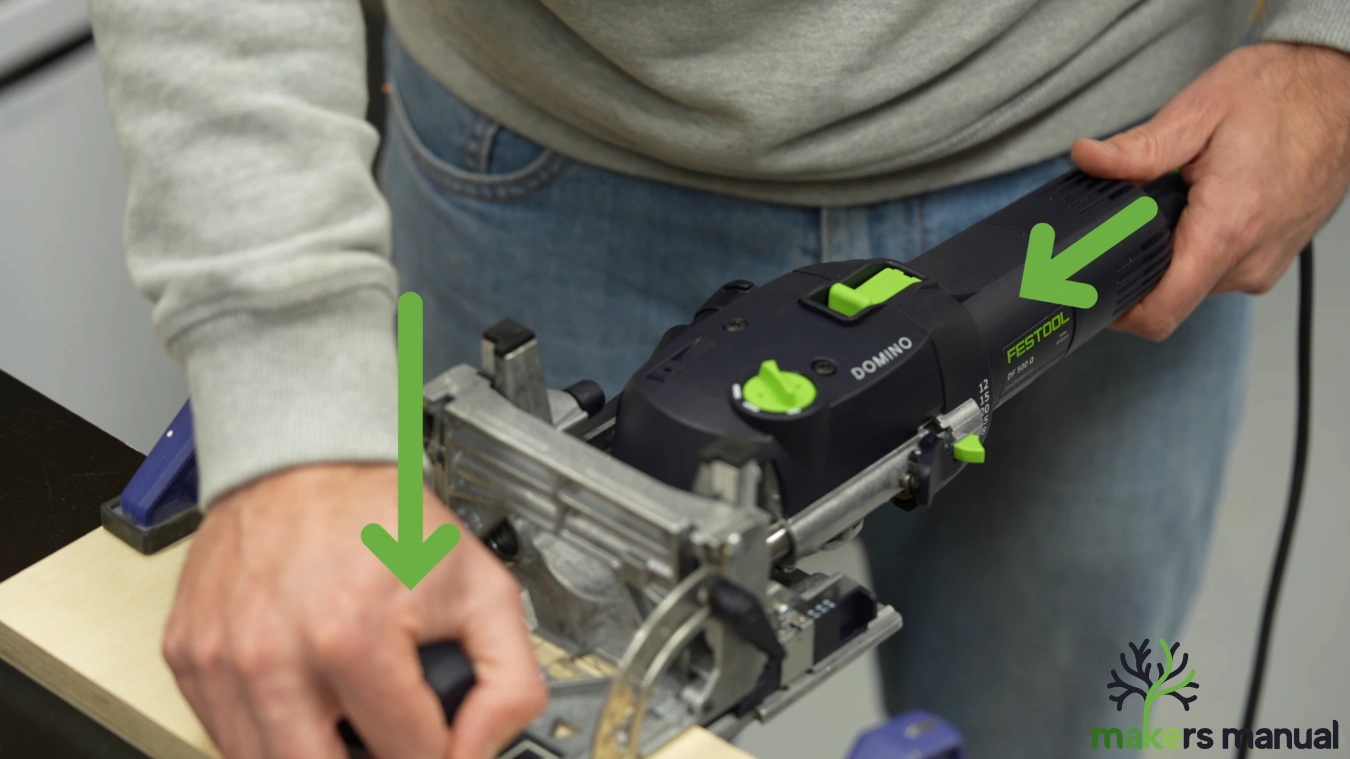
Careful how you hold the tool, you want to hold it securely at the fence and be conscious not to let the tool rotate. Pushing from the power cord helps some people, although I found any approach works, so long as you are careful how you do it.
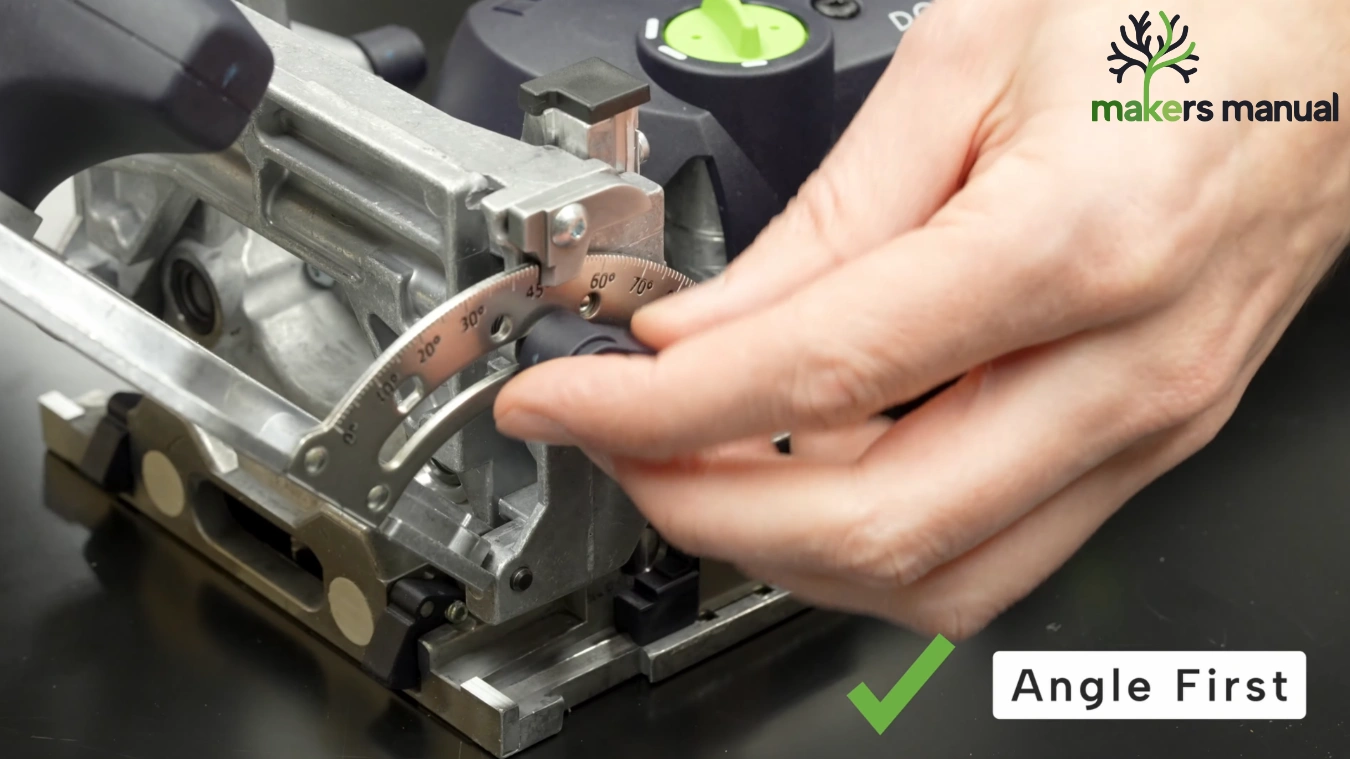
ALWAYS set the fence angle first, then fence height. This is due to a quirk in the tools design that can limit the height if set first.
When using the stop latches, try pivoting the tool in. This gives a more accurate position.

Careful when joining ¾” ply! You may want to reference from the fence, but if the work piece is flat on a desk the base to the tool will touch before the fence.
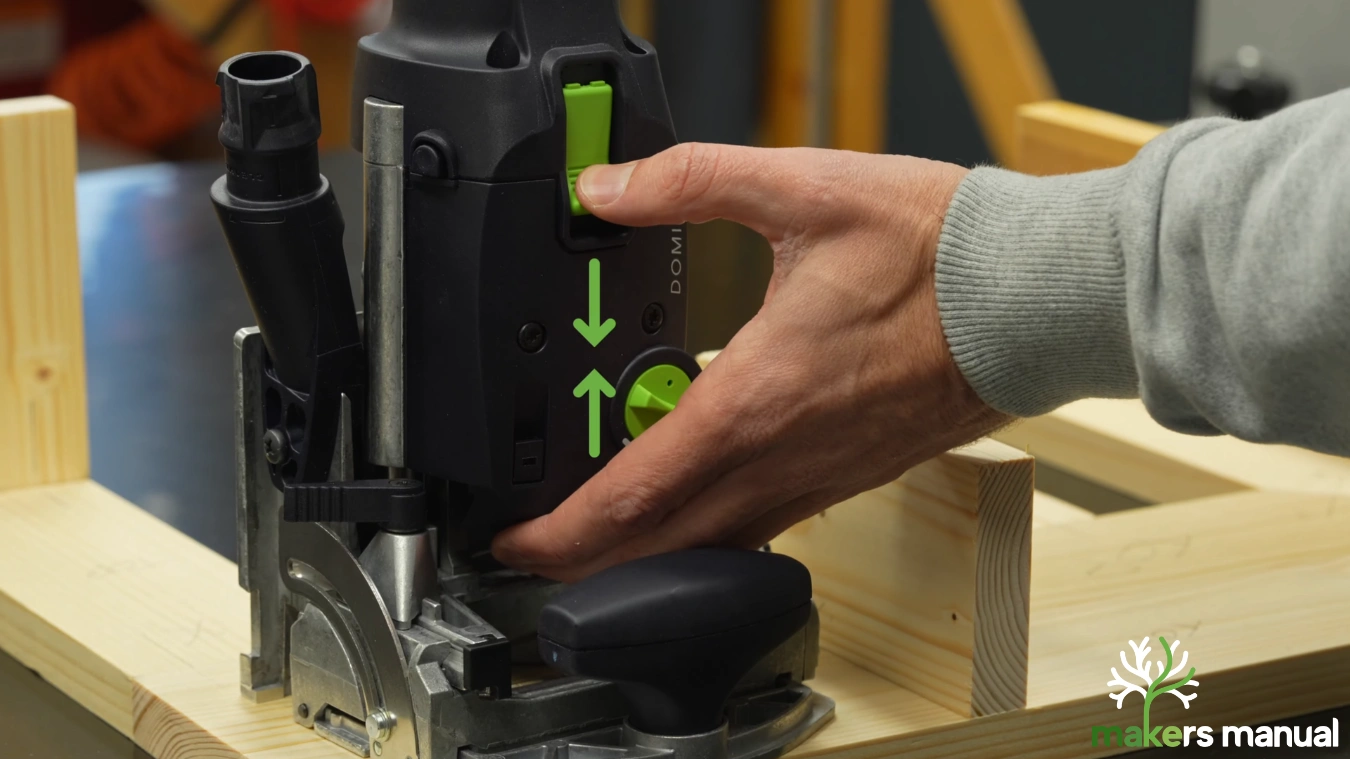
To switch the tool on, when it’s in plunge mode, squeeze as illustrated. This motion stops you accidentally plunging the tool and ruining your workpiece.
- If there is any chatter as you plunge, you’re probably moving too fast.
- Mark all the top surfaces of your workpieces, so you can make sure you’re always referencing the correct faces.
- Always reference from the faces you want to align.
- Secure your workpiece securely.
- Use well milled stock.
- Make the first mortise in the tight setting, and other mortises in the medium setting. This gives you a little more wiggle room during glue up.
- Leave roughly 150-200mm between Dominos.
Tool Calibration
Time Stamped – https://youtu.be/zpcTeHwL2TE?si=hydGbCzpV0vC46TQ&t=1172
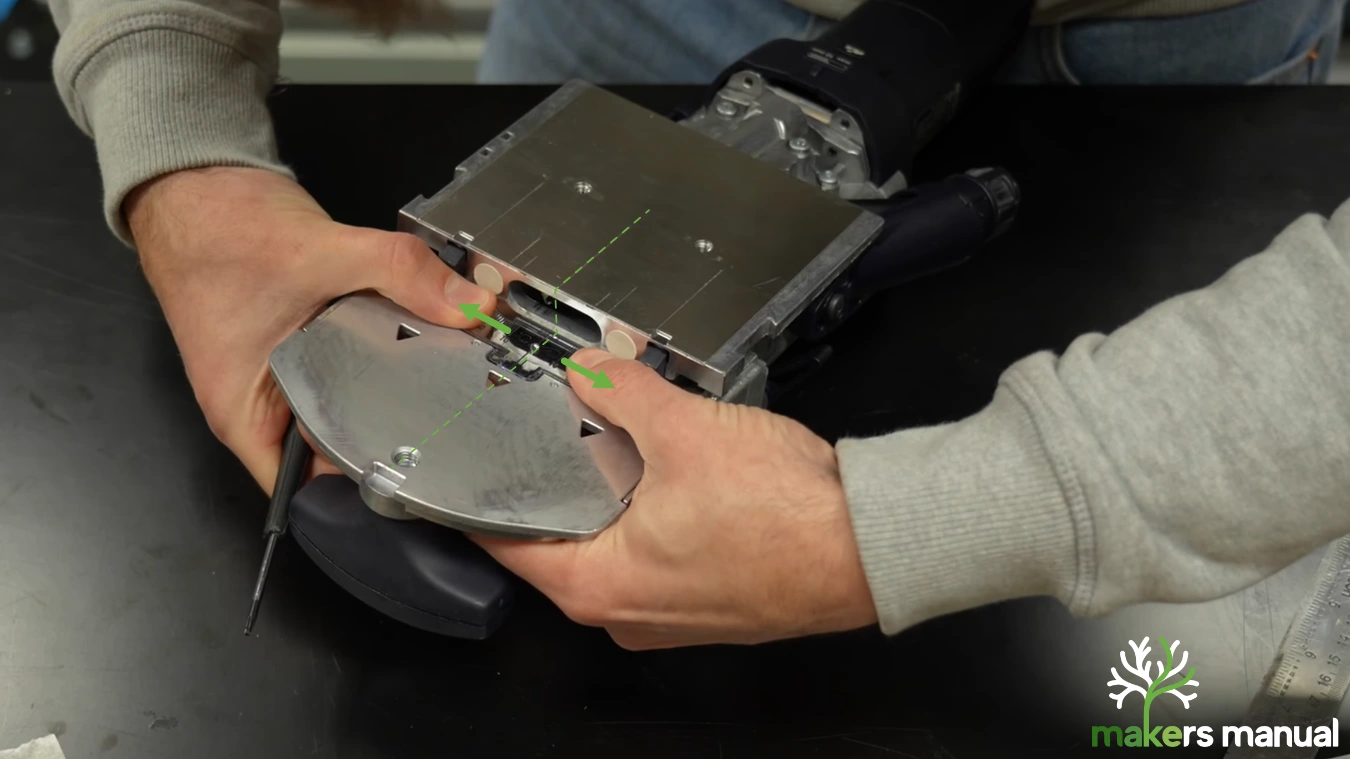
I learnt the hard way, that the Domino is not necessarily calibrated correctly out of the box. This can lead to joints that don’t go together as perfectly as you hoped. This is specifically for joints made when aligning pencil marks with the window of the tool.
To check alignment, extend the lines from the base of the tool and check the align with the window marks. If they don’t, you’ll need to loosen the screws securing the window and align.
Making Joints
Time Stamped – https://youtu.be/zpcTeHwL2TE?si=DUa0Wy9JKE1JEtiL&t=828
In the video I take you through of how to make the following joints. This comes across much better on camera, than I can covey here.

Purchasing the Tool
If you would like to purchase a Festool Domino DF500 or anything else featured in this video, they are linked below.
- Festool Domino DF500
- We would recommend purchasing a bundle that includes the jigs, cutters and Dominos. This is by far the most cost effective way to purchase.
- T-Track
- T-Track Clamps
- Shop Vacuum