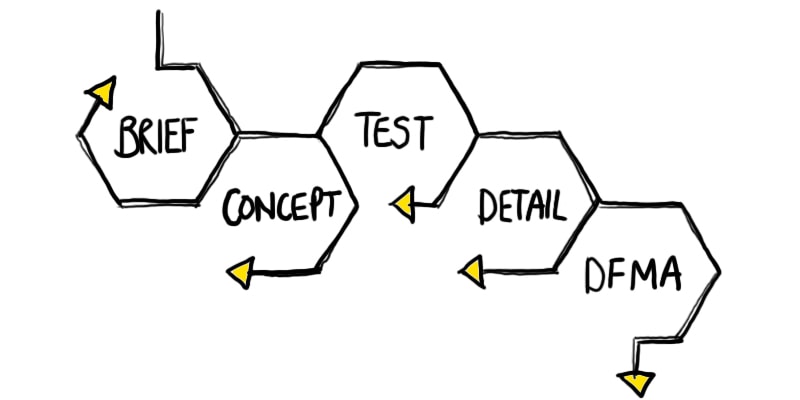
Before becoming a full-time woodworker, Michael was a Product Design Engineering Consultant. Basically, the guy who turns wacky ideas into full blown manufacturable and saleable products. He was also pretty good at it; with a large range of products he is credited with designing. But this post isn’t about that, it’s about the design process he uses and applies to woodworking.
Because we sell plans for our woodworking projects and share them on YouTube. We need to be confident that every project looks great, will stand the test of time and is as easy to make as possible. That means spending the time, to get the design right!
Stage 1 - Research

Every project starts with research. We’re constantly on the lookout for designs we like and woodworking techniques we want to try. We look in furniture stores and magazines, but honestly our best resource for inspiration is Instagram and Pinterest. You can follow us on Pinterest to see the things we’ve pinned. You might spot a few pins that inspired past or will inspire future projects.
So, if you want to start a project, do yourself a favour and do some research! I know it sounds obvious, but you’d be surprised how many people skip this step. Whatever you are going to make will likely cost you money and a lot of time, so make sure your efforts are maximized by putting in the ground work.
Stage 2 - Define the Brief

This may sound a bit much for a little woodworking project. But, over the years we’ve learnt that having a clear objective before you start, can save a huge amount of time down the road. Have you ever started a project, only to find yourself going round in circles? Well I bet you didn’t start with a clear idea of what you are targeting?!
Now we aren’t designing the next space shuttle, so the brief should be brief. Usually, we scribble a sentence or two, maybe with pictures, that summarize what we want at the end of all this.
Stage 3 - Design Development

Now the fun starts, we get to start designing. In product design, this stage will contain multiple sub-stages, but for woodworking we can be a little more concise.
Concept Design
From our research and brief, sometimes we’ll have a strong concept of what the piece will look like. Other times we might only have an idea of elements of the design. Regardless, the next step will be concept design, aka scribbles in a notebook. This process should be very Darwinian, in that it is an evolution from one concept to the next with the strongest elements being carried forwards. This process moves quickly with little time investment in any element.
Detailed Design
Once we have honed in on a winning concept (or two, or three) we will start designing on the computer in CAD software. This helps us visualize the design in detail and work out any kinks quickly. Being able to make changes on the computer hugely advantages the design, it is so much faster and cheaper to do it this way. Better find a mistake now when it’s an easy fix, rather than in the workshop and it’s too late. As well as the look and function of the product, we will also now be considering how it might be made. There is no point creating a design that cannot be made.
If you don’t have any CAD software, why not? It really is a game changer for designing and needn’t cost you anything. Here is a list of the best CAD packages for woodworking. If you’re still not convinced, you can still accomplish this step with pen and paper.
Prototyping
The next step is prototyping, though this step may not be required for all projects. For a simple project, we’ll probably get straight to making the final piece. But if its something more complicated, we will likely prototype.
For instance, for our upcoming Child’s Highchair design, we will make several prototypes from cheaper materials to confirm the dimensions are right. It is important to do this, because some things need to be tested in the real world, to know what works. In other project, like our Cross Cut Sled. We made it from final materials with the hope it was perfect but tested it for several months before we could say with certainty that the design was right.
After prototyping, you should be confident in the design. Or find that a revision needs to be made and maybe prototyped again. Remember no design will ever be perfect, if you strive for perfection you will never get anywhere. But a great designer, knows when a design is ‘good enough’.
Stage 4 - Final Design & Manufacture

This is where we add the final details to the CAD model and make it from the final materials. With all the work you’ve put in, in the above steps. You should find it is easier to build and you get a better final product.
In our case we will also produce an instruction manual and video during this process, as that is the product we are selling, rather than the furniture itself.
I hope this article helps you out with your next woodworking project. Although it may seem like a fuss, we have found it leads to a better product which I hope you will be able to see if you purchase a set of our plans.

